This is an easy one, don’t really know why I am spending the time to write an article about it.
There are several ways to do this but probably the easiest way is to use the Raspberry Pi Imager.
First thing, download the Raspberry Pi Imager from the Ubuntu website:
https://ubuntu.com/download/raspberry-pi
Install it and run it…
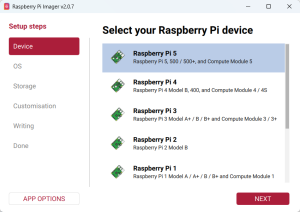
First step is to select your device.
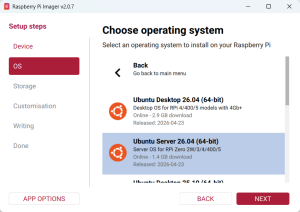
Then, choose the operating sytem: Ubuntu Desktop or Server.
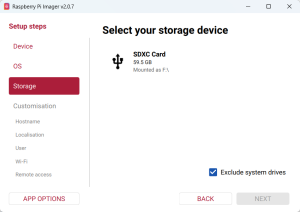
Then, choose your SD card.
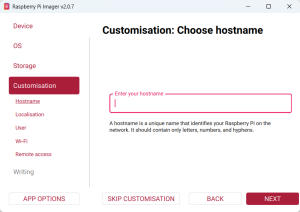
You can customize the hostaname, users, etc. You can do this later, of course. If you don’t plan to ever connect a monitor to it this is the time when you can set the WiFi infomartion and to allow password authentication for SSH.
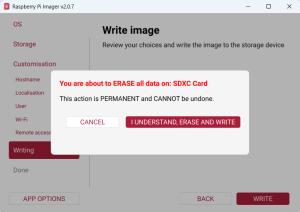
Then, write the image!

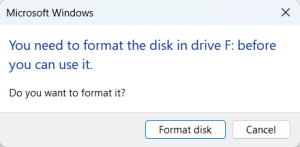
In Windows, a dialog may appear asking you do format the drive. Just ignore it.
Wait a bit and your Ubuntu image will be ready on your SD card.
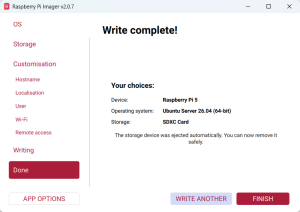
Press Finish and pu the SD card in your Raspberry Pi.
Power up the Rasperry PI and wait for it to connect to the wired network. If you don’t have a wired network and uou did not customize it, you may want to put a monitor on it and connect it to the network manually…
I had some issues with IPv4 connection and I had to manuualy set IPv6 as false in netplan:
cd /etc/netplan/
nano 50-cloud-init.yaml
And here I set:
...
    eth0:
      optional: true
      dhcp4: true
      dhcp6: false
  wifis:
    wlan0:
      optional: true
      dhcp4: false
...
That’s all!